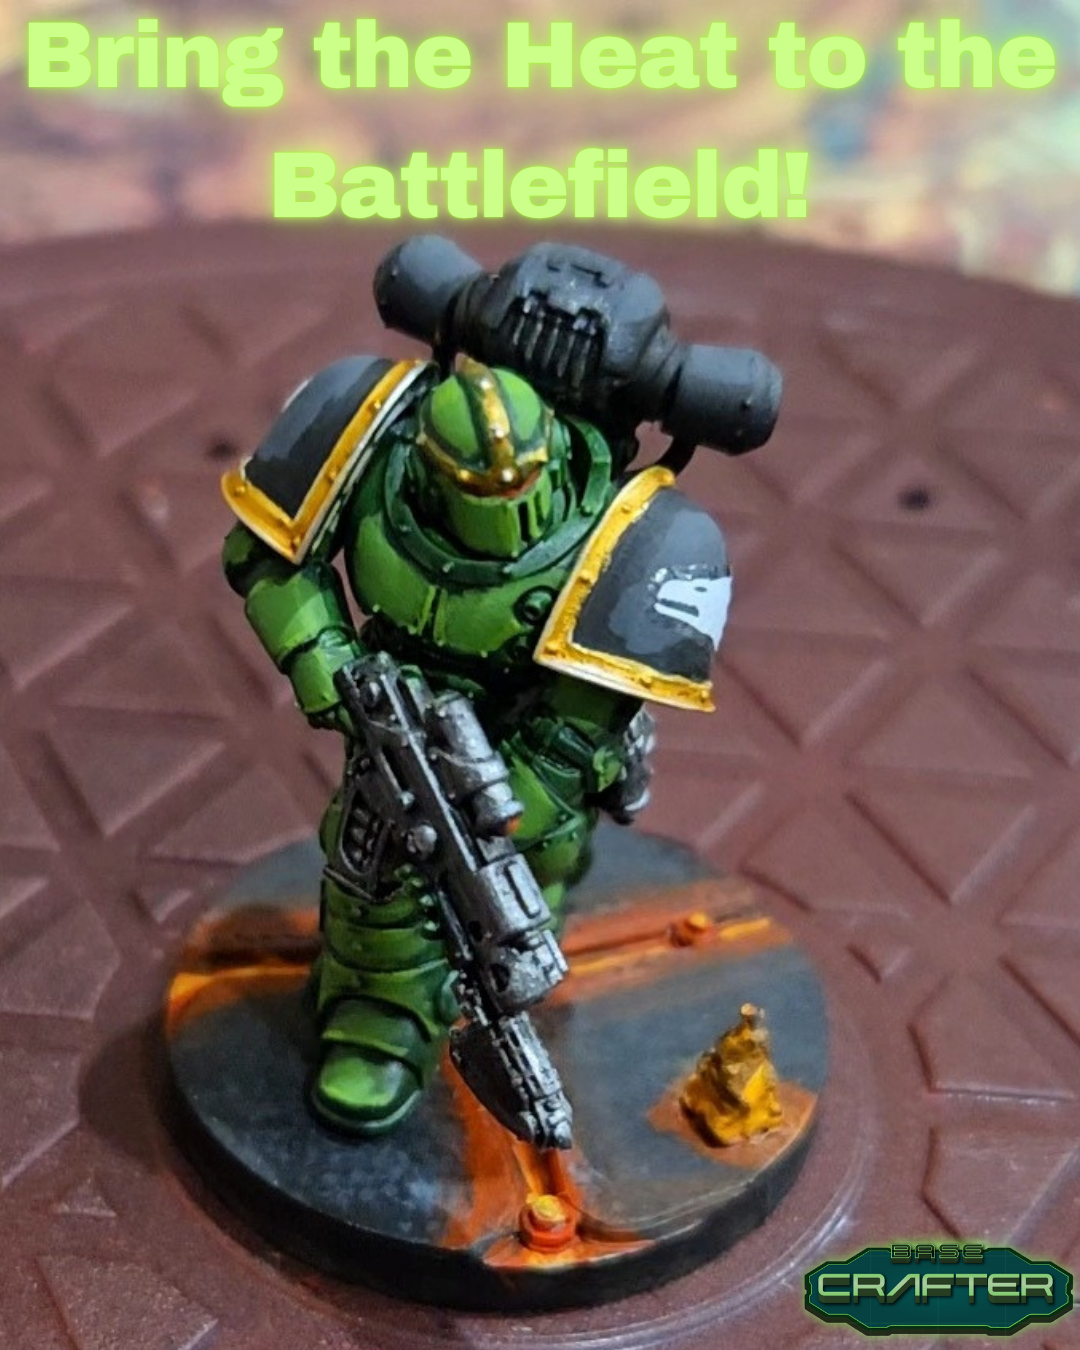
If there's one thing that can make your Salamanders army stand out on the battlefield, it's a killer base that captures the essence of their volcanic homeworld, Nocturne. Nothing says "Sons of Vulkan" quite like the fierce glow of molten lava beneath their ceramite boots!
Today, I'm walking you through my recent project: creating a lava-themed base for a Salamanders unit. The best part? You don't need to be a pro painter to pull this off—just a bit of patience and the right approach. Let's break this down into three manageable steps: Design, Print, and Paint.
Step 1: Designing Your Lava Base
The first step in any great mini project is getting the concept right. For Salamanders, lava bases aren't just cool looking, they're thematically perfect, connecting your marines to their volcanic homeworld and fiery chapter identity.
Using Base Crafter to Design
With a clear vision in mind, I headed over to
Base Crafter's designer to bring my concept to life. What I love about this approach is that you can iterate quickly without wasting physical materials.
For this Salamanders base, I wanted to keep it simple:
Deep crevices for the "lava flows" to run through
A flat spot where the mini would stand
Enough visual interest without being too busy
The Base Crafter interface made this straightforward. I started with the lava base texture and then used the fire object to add some additional small interest. You could go into much more detail, but in this example for my marines I want to keep it simple.
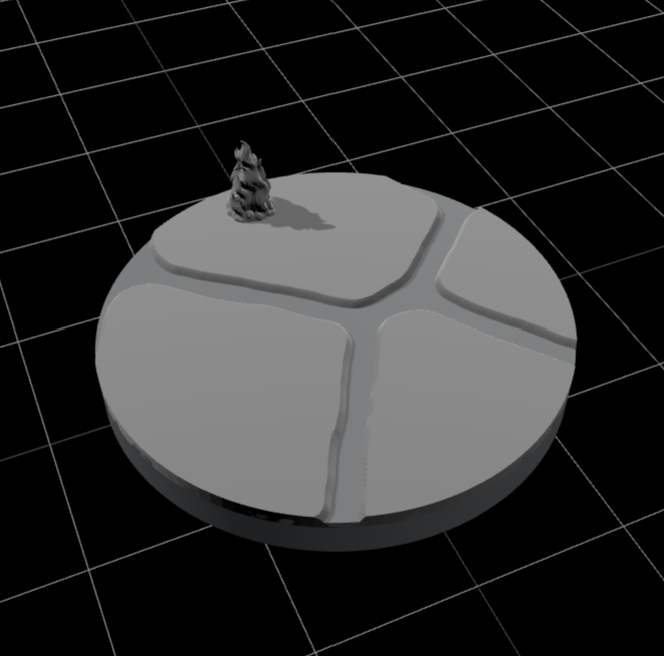
Image failed to load: https://orgyztzknkjoxdiqxnqu.supabase.co/storage/v1/object/public/blog-images/posts/1754346549791-sut8krg2yz.png
Pro Tip: Keep Scale in Mind
One mistake I've made in the past is creating terrain features that look great on screen but are too fine to print properly or paint easily. Remember that your base will need to:
Support your miniature securely
Be printable with your 3D printer's capabilities
Have features large enough to paint effectively
Step 2: Printing Your Custom Base
Once I was happy with my design, it was time to bring it into the physical world. If you're new to 3D printing, don't worry, printing bases is actually a great entry point into the hobby since they're relatively simple shapes compared to intricate miniatures.
Choosing the Right Material
For bases, I typically use my Mars 5 Ultra with water washable resin, but lately, and in this example I gave my Bambulabs X1C with black PLA a go.
The Printing Process
I used a 0.4mm nozzle with the default 0.12mm High Detail Bambulabs setting, making sure to enable ironing on top surfaces. The print for 2 bases took around 40 minutes, which gave me plenty of time to gather my painting supplies and choose my colours.
Step 3: Painting Your Lava Base
This is where the magic happens! Painting lava effects might look complicated, but it's actually one of the more forgiving techniques in the miniature painting world. The organic, random nature of lava means that "mistakes" often just add character.
Materials You'll Need
For this project, I used:
GW Wraith Bone spray primer
Red, orange, and yellow paints (I used vallejo paints: Scarlet blood, Hot Orange, Moon Yellow, and Flash Gitz Yellow)
Black paint to create the volcanic/ash covered rocks
White paint for the hottest spots and to mix with black to create greys
Large and medium detail brushes
An old brush or specific dry brush for dry brushing
Stage 1: Priming and Basecoats
First things first—I primed the entire base with Wraith Bone. This serves two purposes: it gives the paint something to grip to, and it provides the lighter base for our bright lava effect.
Once the primer was dry, painted the raised areas black, trying to avoid getting too much black in the cracks. This creates the foundation for our volcanic rock.
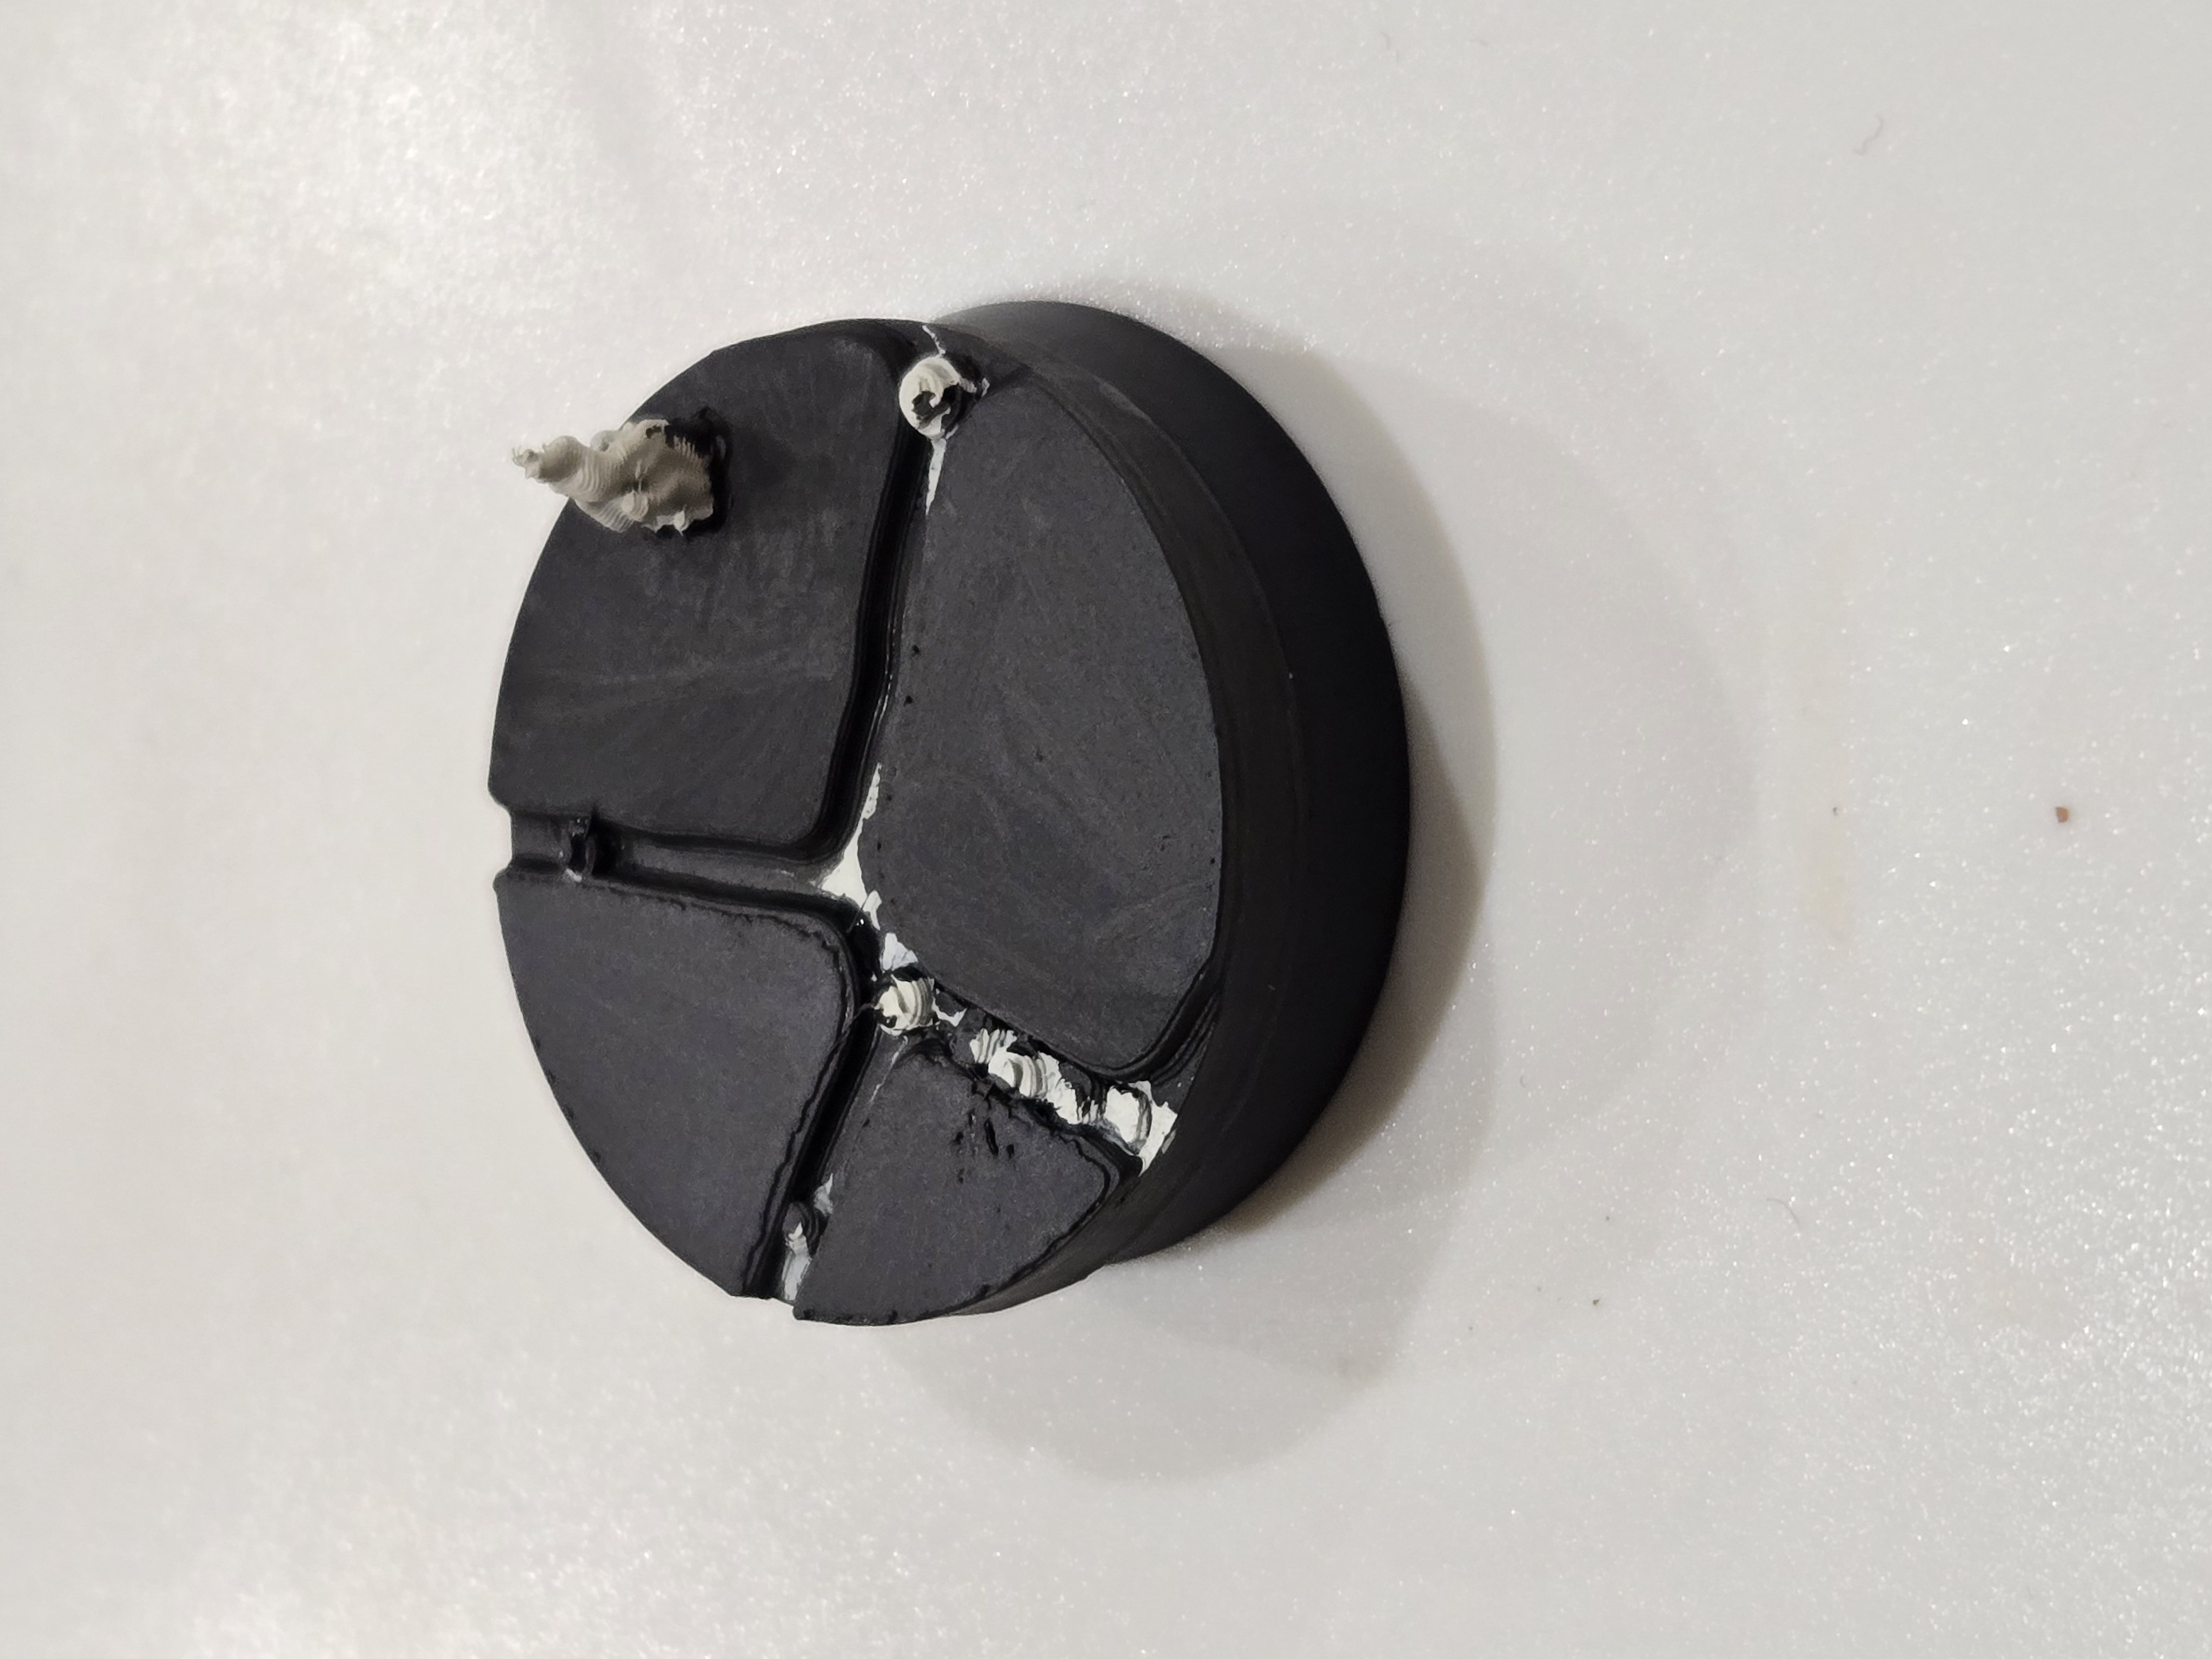
Image failed to load: https://orgyztzknkjoxdiqxnqu.supabase.co/storage/v1/object/public/blog-images/posts/1754347604551-h9u3w912zwu.jpg
Stage 2: Adding detail to the raised surfaces
Next, I mixed my black with white to create a slightly lighter greay and used my dry brush to stipple on uneven details on the raised surfaces and dry brushing the edges to create lighter areas for our glow later.
From there continue to add slightly more white to your grey mix to create variation in the surface textures.
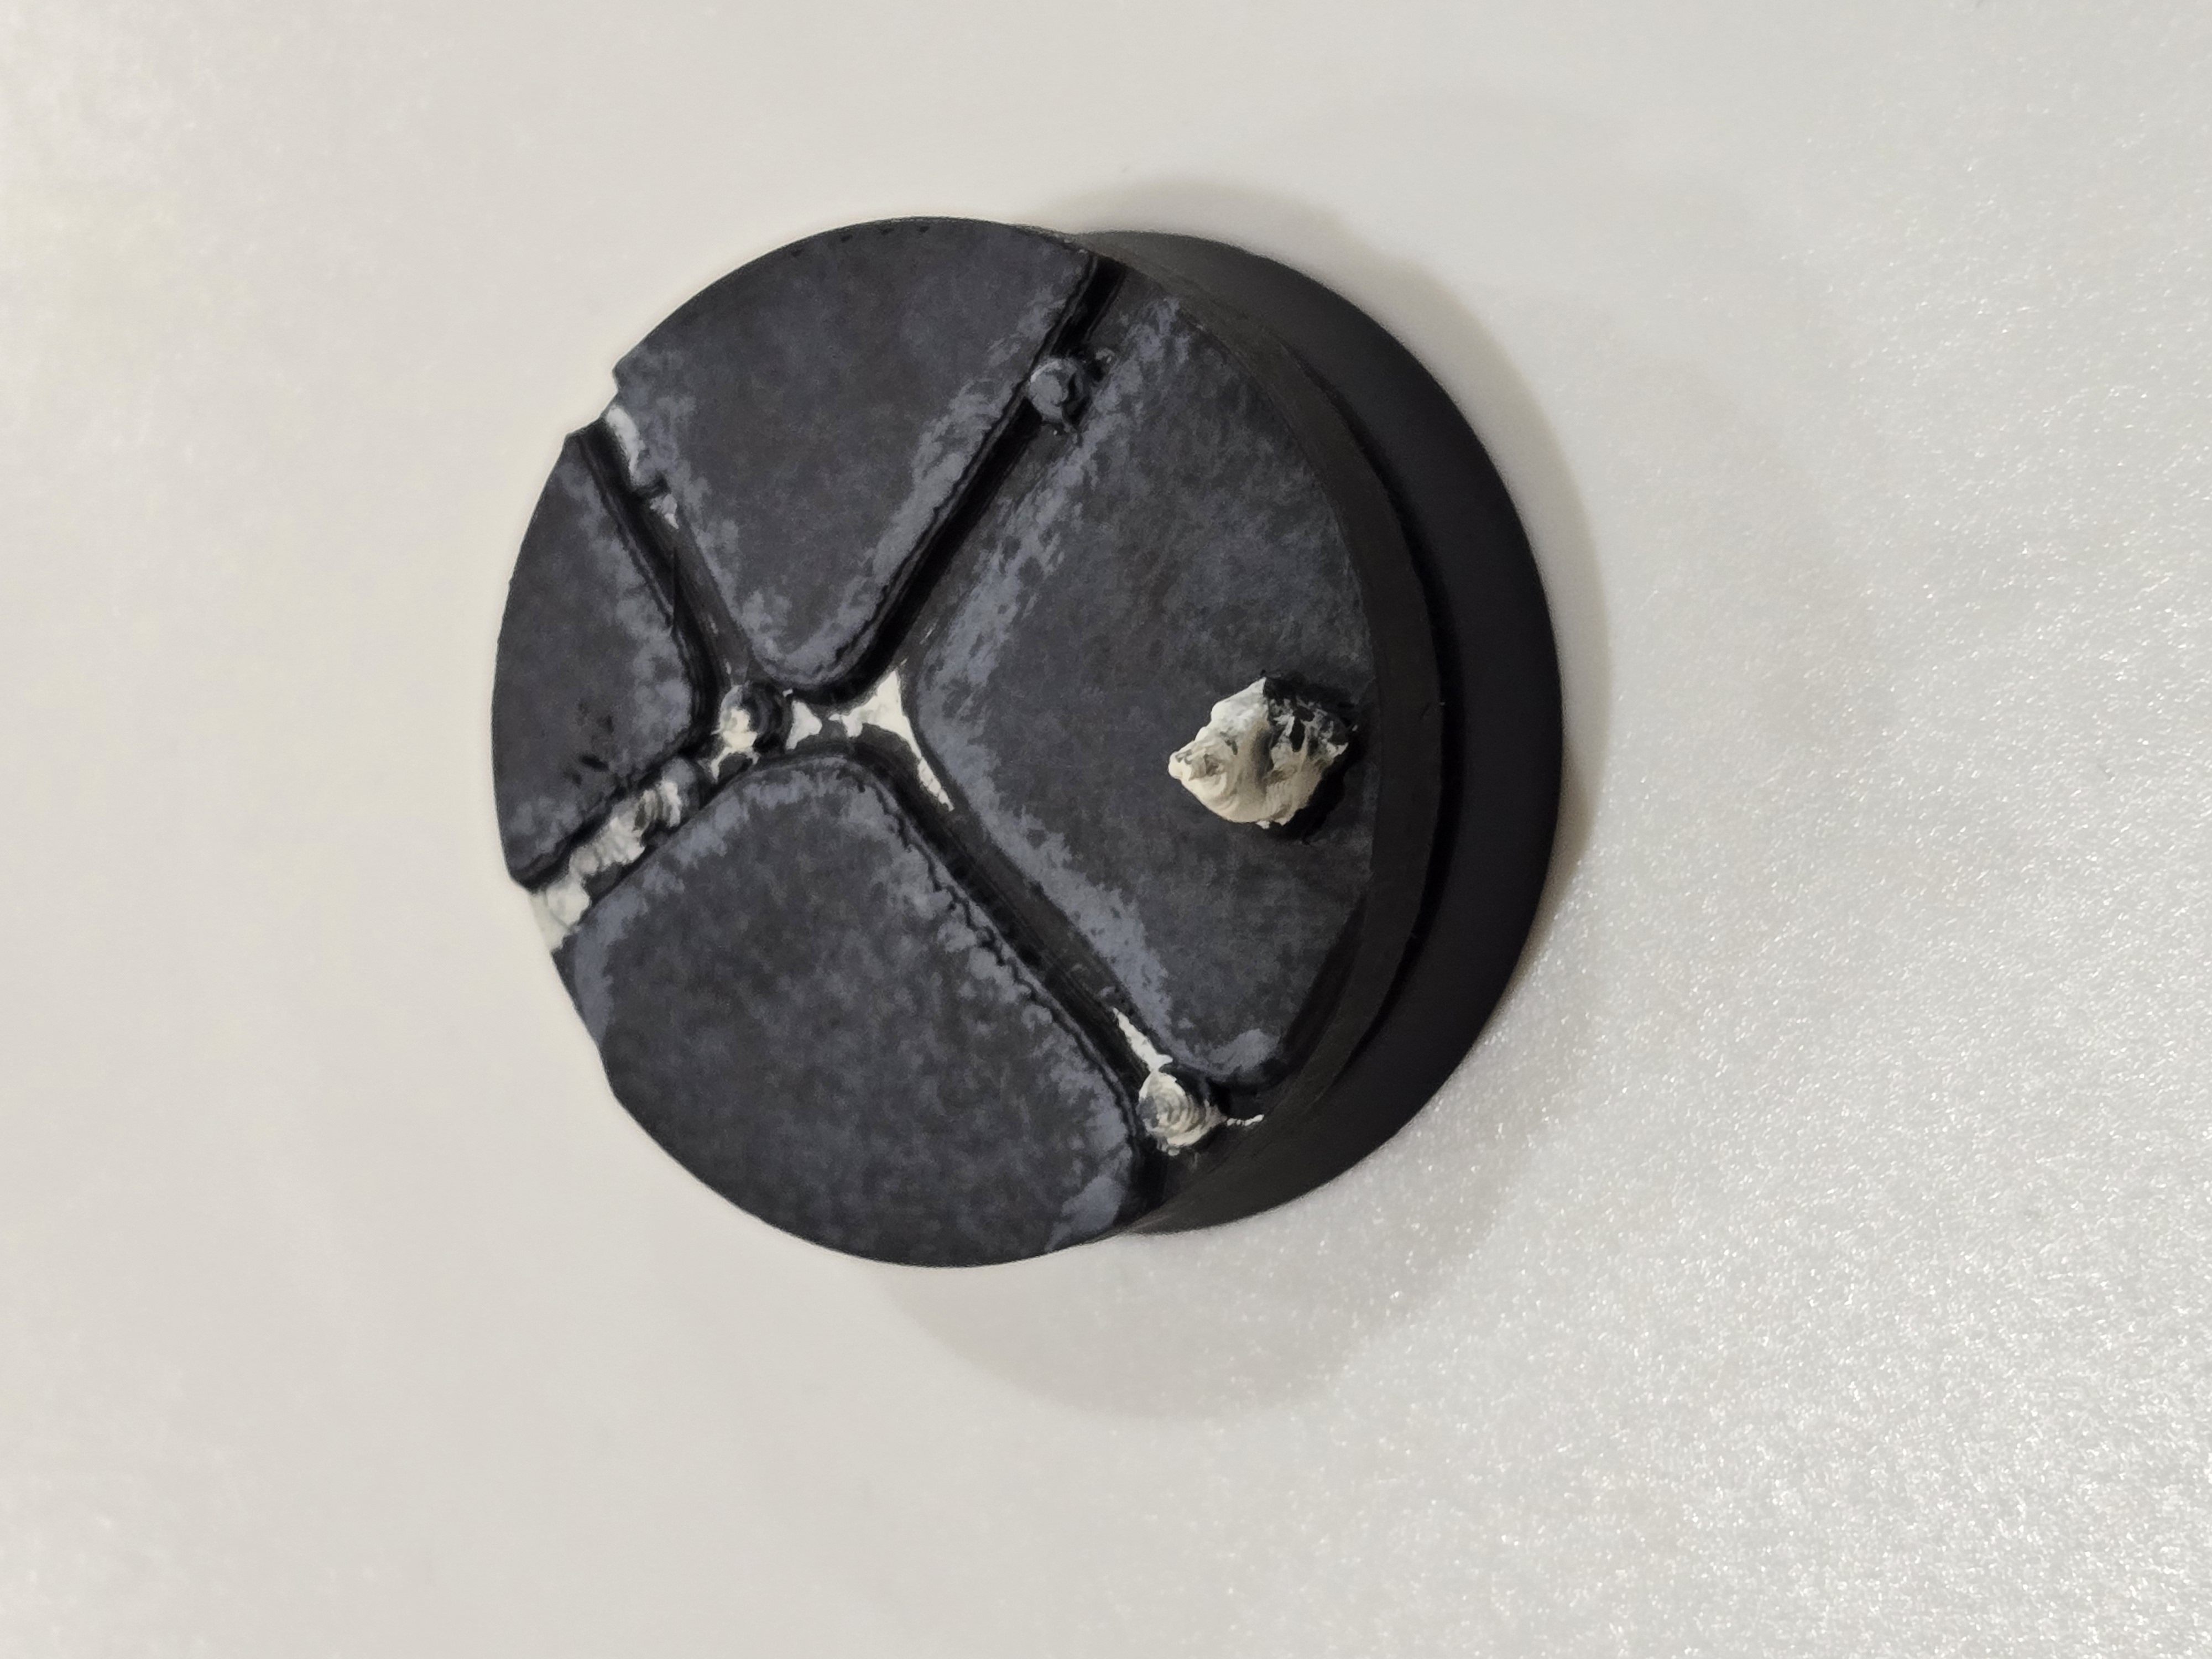
Image failed to load: https://orgyztzknkjoxdiqxnqu.supabase.co/storage/v1/object/public/blog-images/posts/1754347604551-rhgmhqht5b.jpg
Step 3: Painting Your Lava Base
This is where the magic happens! Painting lava effects might look complicated, but it's actually one of the more forgiving techniques in the miniature painting world. The organic, random nature of lava means that "mistakes" often just add character.
Materials You'll Need
For this project, I used:
Black primer
Red, orange, and yellow paints (I used Citadel paints: Khorne Red, Evil Sunz Scarlet, Fire Dragon Bright, and Flash Gitz Yellow)
White paint for the hottest spots
Dark gray paint for the rocks (Eshin Gray)
Light gray for dry brushing (Dawnstone)
Medium and small detail brushes
An old brush for dry brushing
Stage 1: Priming and Basecoats
First things first—I primed the entire base black. This serves two purposes: it gives the paint something to grip to, and it provides the perfect dark base for our lava effect.
Once the primer was dry, I dry-brushed the entire base with dark gray, focusing on the raised areas to highlight the texture of the rocks. This creates the foundation for our volcanic rock.
Stage 3: Adding the Lava Effect
Now for the fun part! I worked from dark to light, which is key for creating a convincing lava effect:
First, I painted all the recessed areas and channels with Scarlet blood. Don't worry about being super neat—lava is chaotic!
Next, using Scarlet blod I dry bry brushed the edge of the raised areas to add some glow
Next, I applied Hot orange over about 75% of the red areas, leaving some of the darker red showing around the edges. This starts to create the impression of heat.
For the hottest parts of the lava, I used Moon yellow in thin lines right down the middle of the larger channels.
Finally, I added tiny dots of white in a few spots to represent the absolute hottest points.
The key is to blend these colors slightly where they meet, but don't overdo it—lava has natural color transitions that can be quite abrupt.
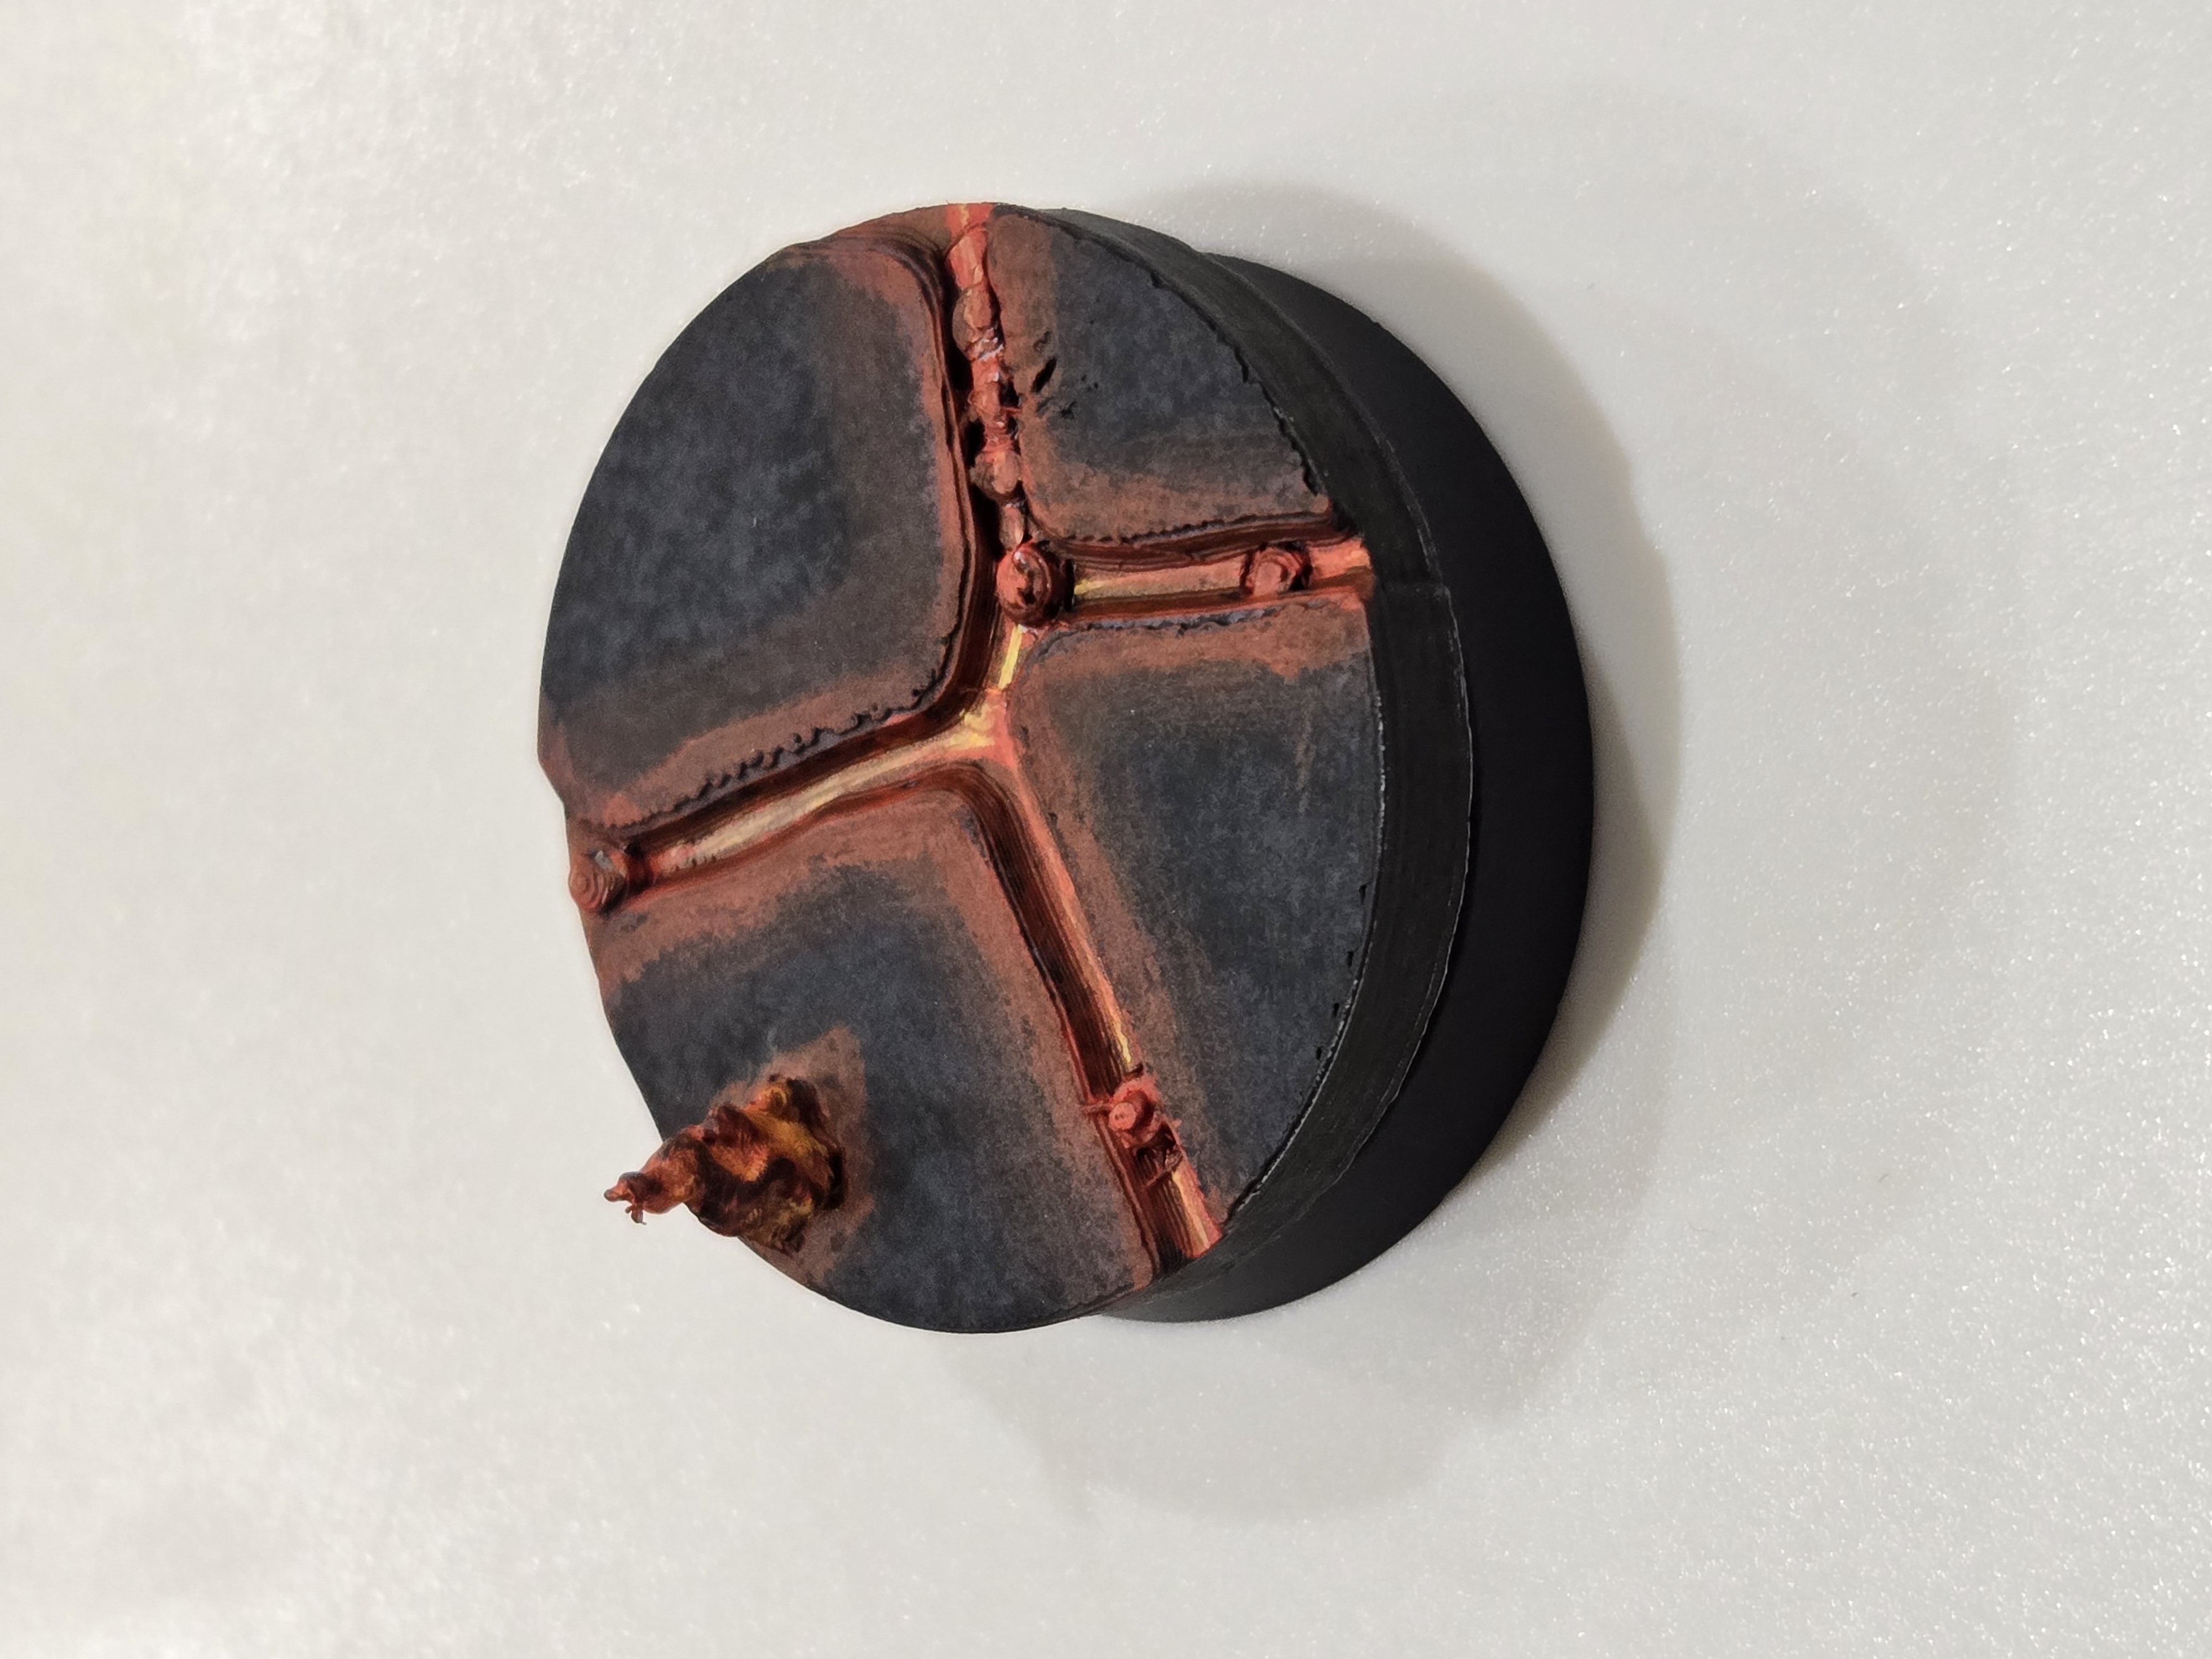
Image failed to load: https://orgyztzknkjoxdiqxnqu.supabase.co/storage/v1/object/public/blog-images/posts/1754347604552-r5byu6pj82f.jpg
The Finished Product
After a couple of hours of work spread across a weekend, my Salamanders lava base was complete! The combination of the 3D-printed texture and the fire and rock paint scheme creates a base that not only looks impressive but also ties perfectly into the Salamanders' lore.
What I love most about this project is how the base tells a story. It's not just a platform for your mini, it's part of the narrative. You can imagine your Salamanders Space Marines striding confidently across the molten landscape of their homeworld, completely in their element where other chapters would falter.
Why This Approach Works
Creating custom bases through the design, print, paint workflow has several advantages:
Thematic Consistency: Every base in your army can have variations on the same theme, creating a cohesive look across your force.
Cost-Effective: Once you have your printer set up, you can create countless custom bases for less than buying premade ones.
Uniqueness: Your army will stand out with bases that nobody else has.
Skill Building: Each base you design and paint improves your abilities for future projects.
Taking It Further
If you want to expand on this concept, consider:
Adding small details like skulls partially submerged in lava
Creating larger display bases with more elaborate lava flows
Varying the base designs across your army while keeping the same theme
Experimenting with OSL (Object Source Lighting) techniques to make the lava light illuminate the bottom of your miniatures
Final Thoughts
The beauty of this three-step process is that it's accessible to hobbyists of all skill levels. Whether you're a veteran painter or just starting out, creating custom lava bases is a rewarding project that will instantly elevate your Salamanders army.
Remember, the most important thing is to have fun with the process. Don't stress about making everything perfect—lava is wild and unpredictable by nature, which makes it one of the most forgiving effects to paint.
Have you created themed bases for your Warhammer 40K armies? Thinking about trying this lava effect for your Salamanders? And if you're ready to design your own custom bases, head over to Base Crafter's designer to get started.
For Vulkan! For Nocturne! For bases that are literally fire! 🔥